Now that we have outlined all the individual steps, we thought it would be fun to break down the last scene of the video to show you how it’s all connected. This is (literally) the money shot!
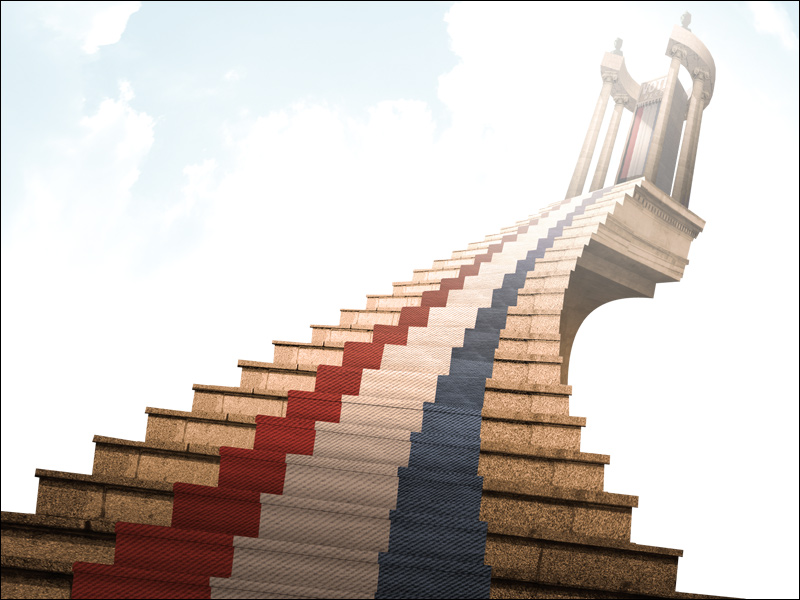
The very first task in visual development was figuring out exactly what the voting booth should feel like. As you can see, it evolved from Vegas flashing lights to majestic Greek architecture. Click to enlarge…


With the look and feel locked down, and a sense for how we wanted the scene to move, we ran a quick 3D test to make sure that the action worked before we dove into the weeds on the scene. This shot was entirely recreated with 2D software and cut outs once we were comfortable with the movement.
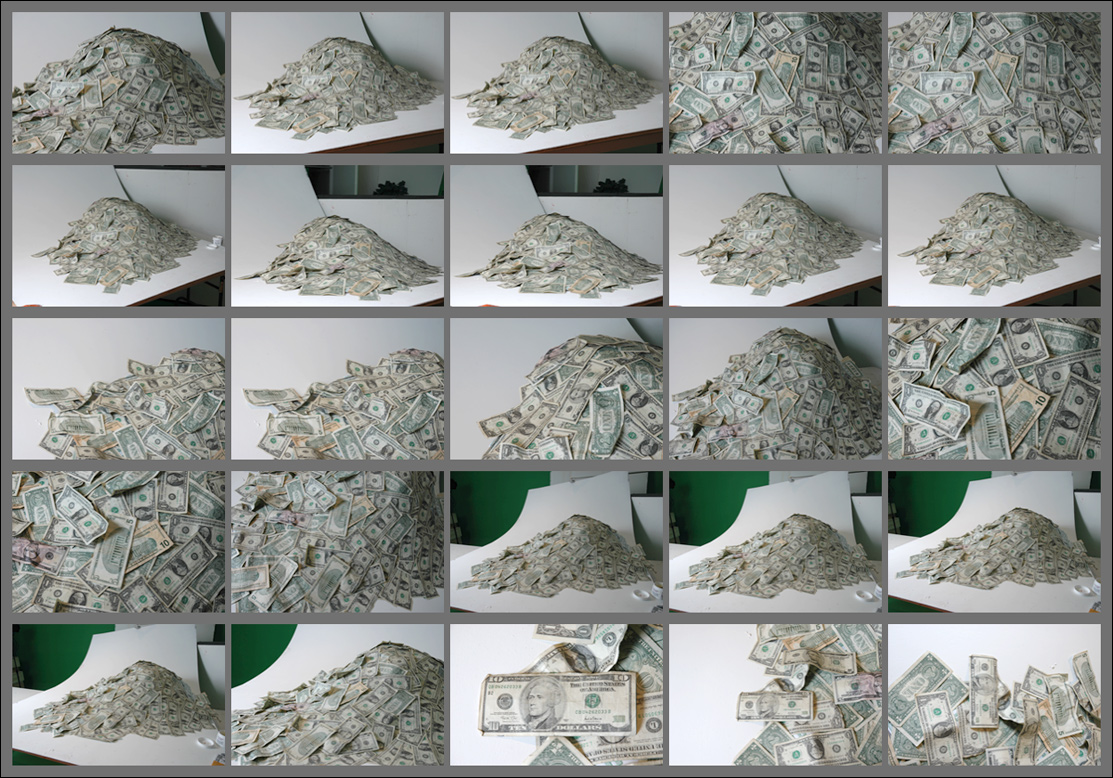
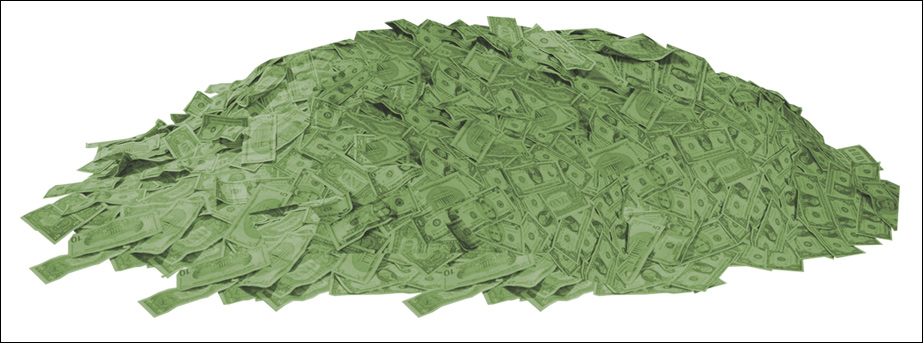
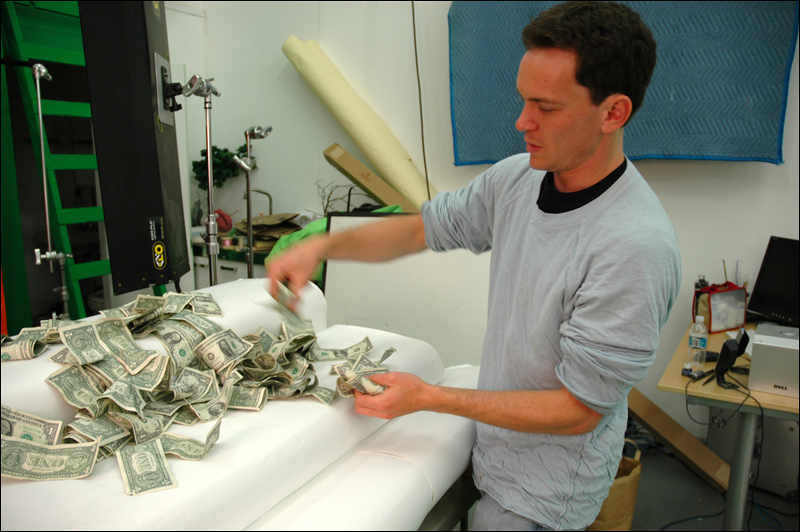
While the motion test was under way, we began building our model so that we could have giant stacks of money reaching up to the heavens. We photographed about 50 bucks scattered over a paper mache mound then cut and colored it in Photoshop. Look closely and you’ll see a lot of fake money in there too…
In addition to photographing the mountain of money, we also built a temporary set of stairs so that we could film what money would look like falling onto those stairs…
We filmed the money falling against a red sheet so we can use technology to extract just the dollars falling from the sky and then layer it in on top of the animation. This process is called “keying”. Here’s a clip of the film after the “keying” (or dropping out the red)…
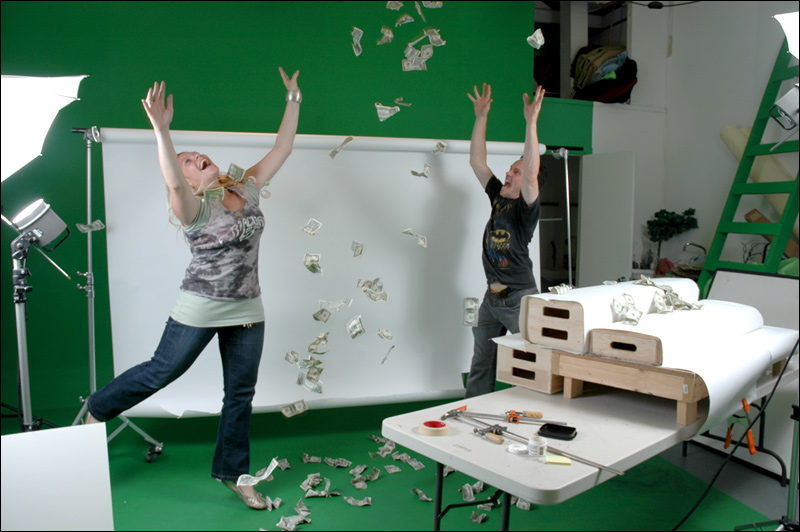
Throwing money is fun! Here is a snapshot of our highly trained money throwers in action!
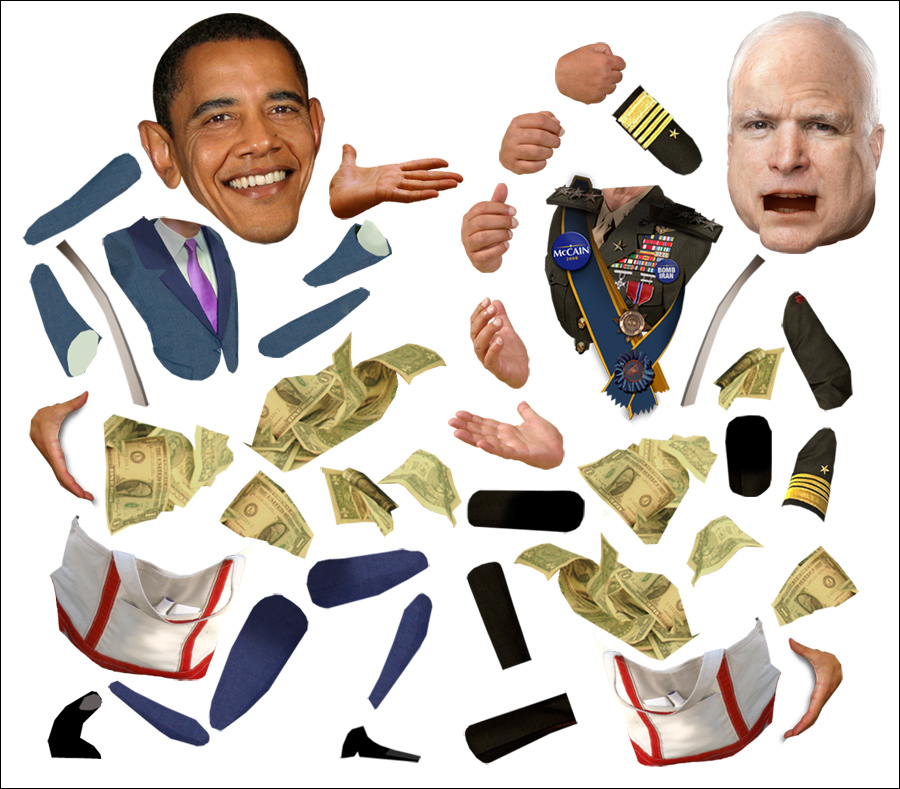
To get the characters to appear as if they are throwing the money requires a lot of small, complex movements. To do that in animation means you have to break the character into lots of symbols that can be moved independently of one another. Here are all the pieces that we used to pose and rigg up our characters and their money bags so they could be placed on the steps…
While the character animation was happening, we began to recreate the 3D camera move winding up the stairs. We used 2D cut out elements in after Adobe After Effects to create the illusion of 3D. This is one of the first attempts and we used temporary assets to help us figure out what kind of shapes we would need for the final pass…
With all the separate pieces in place, we layered all the background images and character animation into the After Effects file. There were about a BILLION layers in the file! Here’s what it looks like altogether before we add the final spit shine and lighting…
Finally, with the core fotage in place, we use Adobe After Effects to create the lighting effects and color correction that you see in the finished movie.
All that work for 3 1/2 seconds of magic!

One response to “Putting it All Together”
[…] videos and background including the use of AE in their productions; see for example Putting it All Together and their Behind the Scenes of the 2010 Year in Review […]